After building my new motor, I decided I wanted to know a little more about what is going on with it. I have also become very reliant on the vast amounts of information you can get from modern ECUs and OBD2 systems when troubleshooting issues. Being that our Motronic DMEs don’t have much of an external interface, external gauges are our best bet.
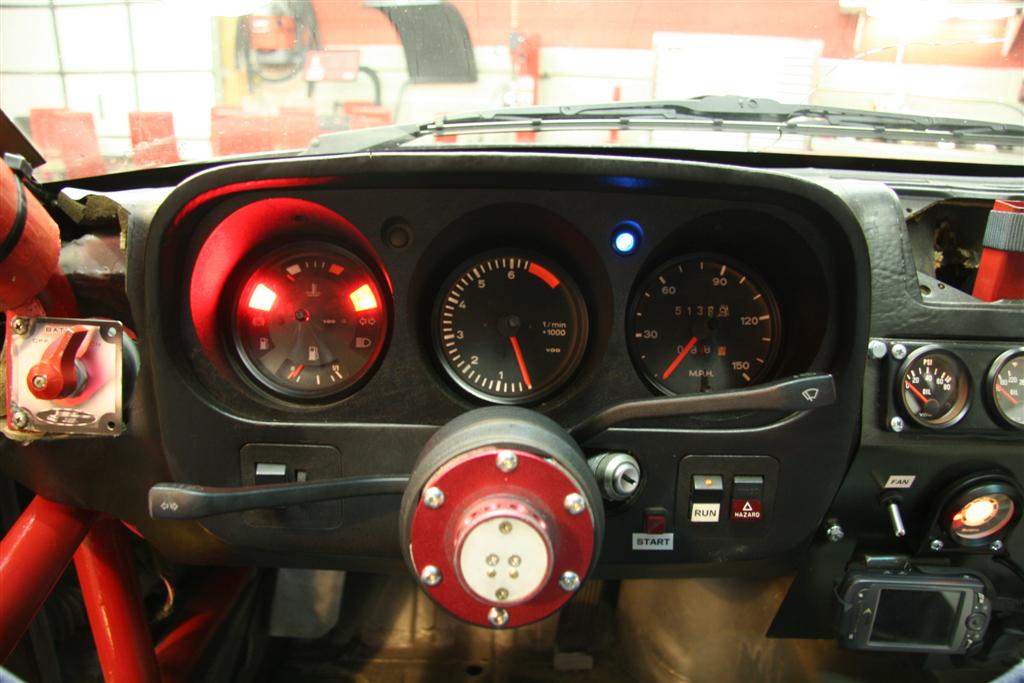
When I built the car in 2008 I installed a mixture of 912, 924T, and 924S gauges in the factory early dash.
My car still has working headlights, thus I wanted working gauge lights too:
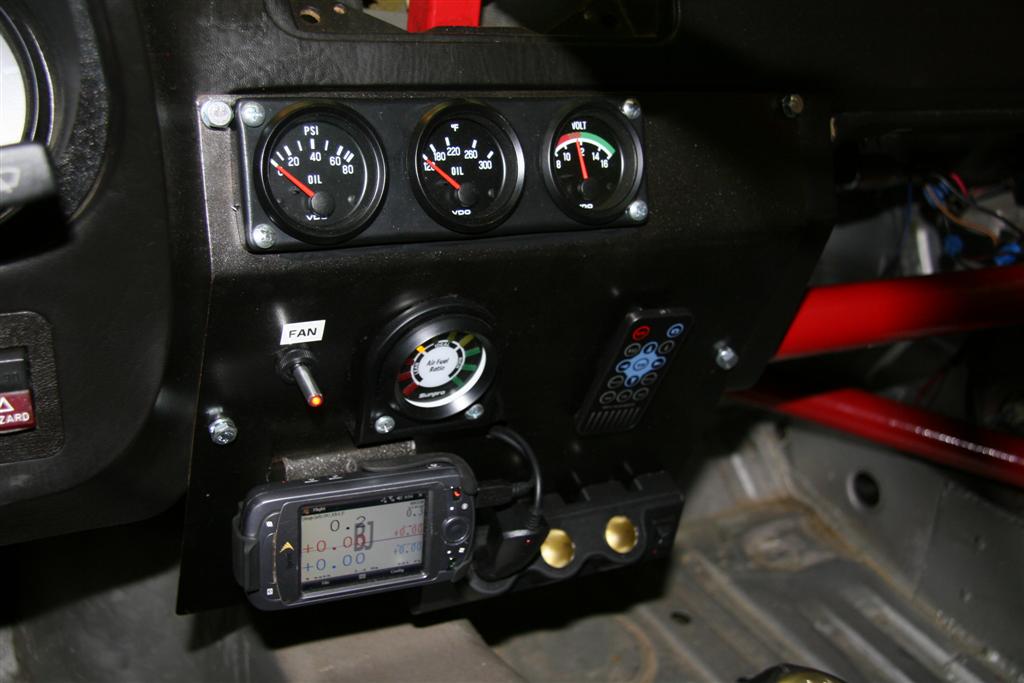
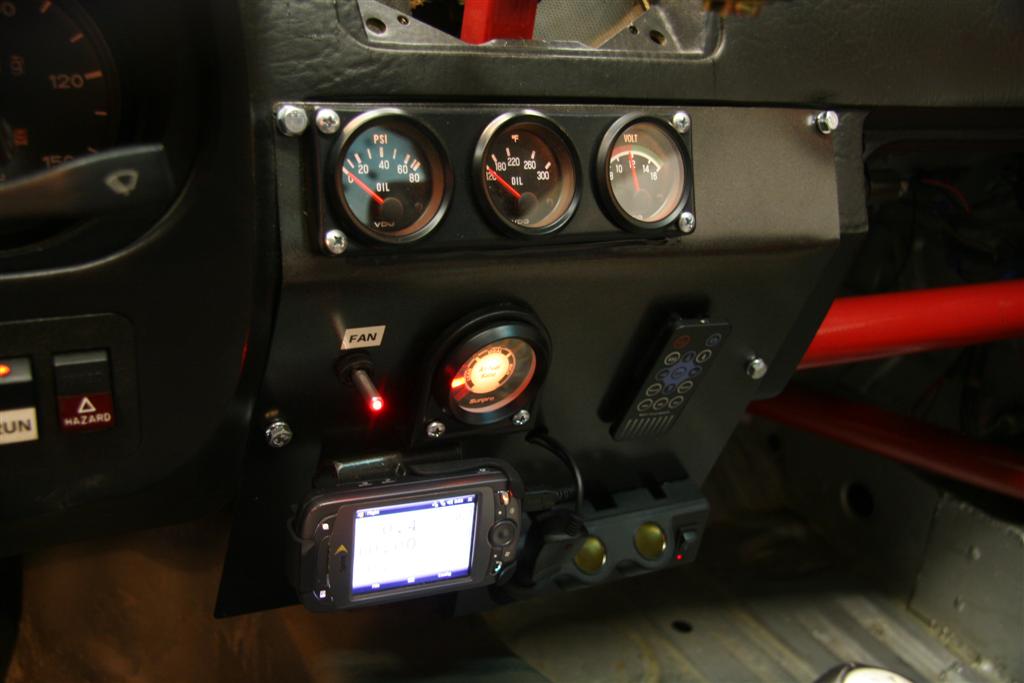
The new gauge panel:
You can see I have Oil Pressure, Oil Temp, Voltage, a cooling fan switch, A/F Ratio, Data Aquistion display, camera controls, and 12V power outlets for charging camera, data system, etc.
Installation Details
Tach
The tach I use is a standard sweep mounted in the middle, so it works great. It was simple to hook up needing only 12V, ground, and a tach signal.
Hooking up and aftermarket tach should be just as easy. I believe the tach signal wire is the green one in the connector that goes to the OEM gauge.
Speedo
The speedo I installed uses the same cable driven setup as a stock 944 gauge.
I haven’t looked at aftermarket speedo senders.
Fuel Level
My fuel gauge in the 924S cluster is accurate, so I left that alone. The 924S multi-gauge uses the factory plug, too.
Water Temp
The factory water temperate is non-buffered and works well, so I didn’t see a need to replace this either.
Clark's Garage has an article that explains what temps the factory marking corresponds to:
www.clarks-garage.com/shop-manual/elect-19.htm
If you do want to replace the stock water temp gauge, there are some things you need to know. There are two different style senders. The early cars use a single connection sender that doesn’t actually touch the coolant passage. The late cars use a probe type 2 connection sender that actually enters the coolant passage. One connection is for the gauge and the other is for the high temp warning light. Both early and late senders use a M10x1 thread. If you want to use an aftermarket water temperature gauge, there are VDO sensors that will screw into the factory location for the head.
Oil Pressure
My factory 5 bar oil pressure gauge was very erratic. You have two options when replacing the gauge: mechanical or electric. I didn’t like the idea of running hot oil into the cabin, so I went the electrical route.
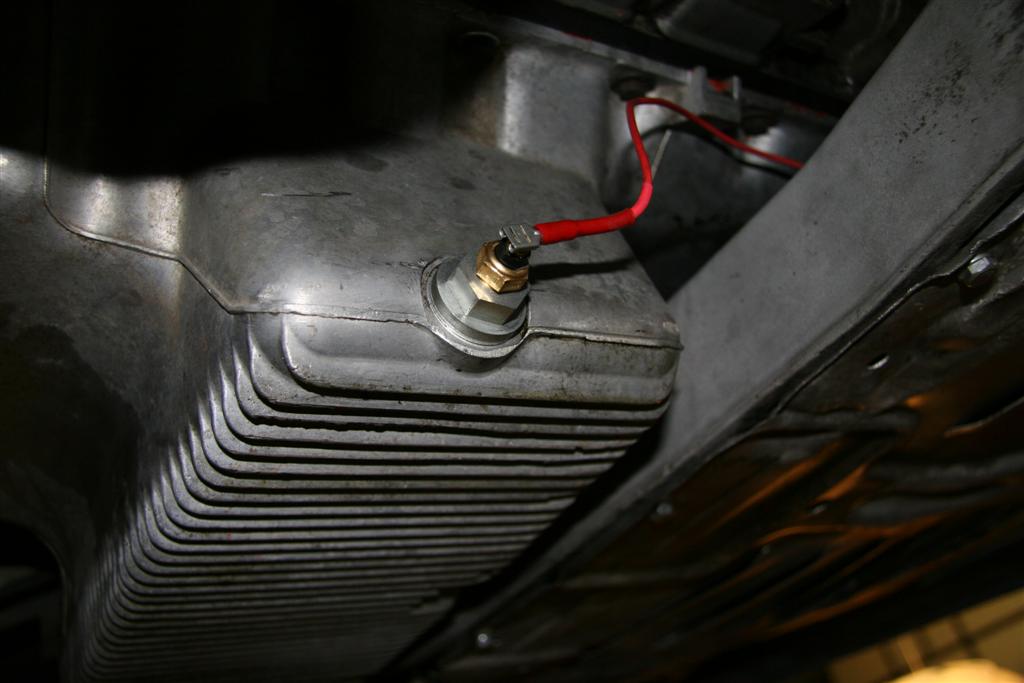
The factory oil pressure sender uses a M18x1.5 thread and has two connections: a gauge connection and a warning light connection. The factory sender range isn’t compatible with any aftermarket gauges. I used an adapter from egauges.com to go from the M18x1.5 to 1/8” NPT. This lets you use almost any aftermarket electric gauge.
The black is a rubber grommet, not oil.
I used a VDO sender and gauge. I used a two dual connector sender that supports the factory oil pressure warning light. I also used the factory wiring. The factory connector will plug directly into a aftermarket VDO gauge, but you have two switch the wires for signal and 12V power.
If you want to use a mechanical sender, you can use the same adapter I used above or Lindsey Racing makes an adapter that allows you to retain the OEM sender for the warning light and add a 1/8” NPT mechanical sender.
Oil Temp
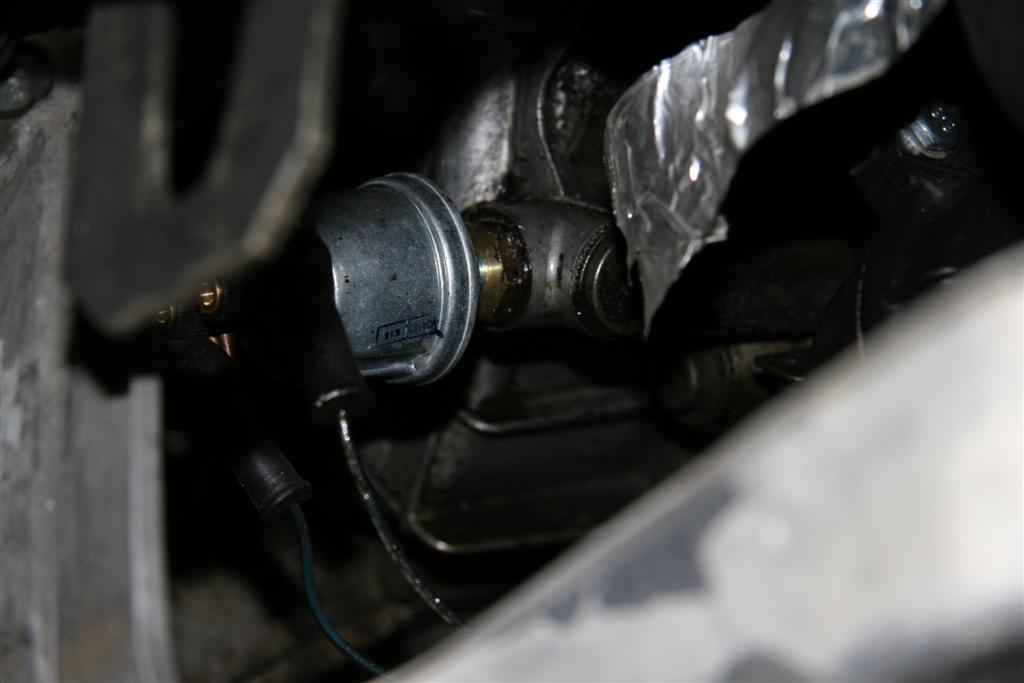
For oil temp, you can tap the pan. The late cars have a great spot for this where the Turbo cars have an oil line connector.
The easiest way to add a sender is to put the sender in the oil drain plug. If you want, you can drill and tap the original plug. When you do this, you lose the magnetic feature of the plug, though.
I opted to use the adapter from Lindsey Racing. There adapter is a quality product that screws into the factory M20x1.5 drain plug hole, adds a 1/8” NPT sender hole, and has a strong magnet on the end.
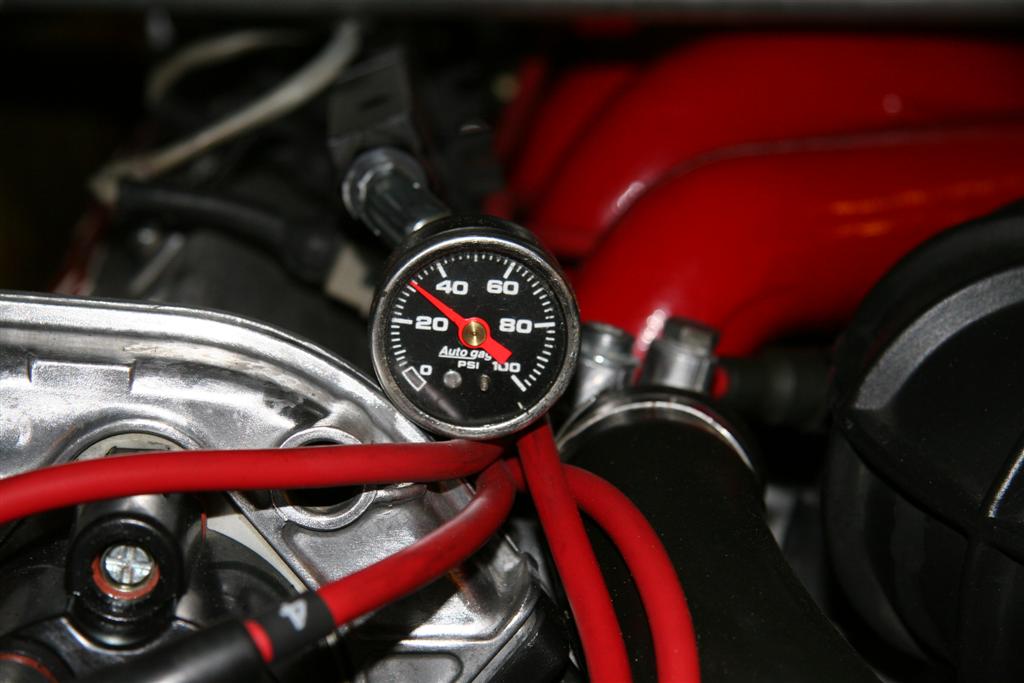
Fuel Pressure
There is a M14 cap on the end of the fuel rail. While you can tap this for a gauge or sender, there isn’t much material there—fuel leaks are bad.
Lindsey Racing, Paragon Products, and others sell an adapter to let you use a standard mechanical gauge. Be sure the adapter you use lowers the position of the gauge, or it won’t clear the hood.
I am using the kit from Paragon Products that just has an under hood gauge. I figured this was good enough for troubleshooting purposes.
If you want to add an in-dash fuel pressure gauge, I would recommend the adapter from 9xauto.com. Their adapter gives you a 1/8 SAE port. You can screw an electric oil pressure sender in and use the corresponding gauge to display the fuel pressure.
A/F
On a whim I added a narrow band Air Fuel ratio gauge. It has been very informative. Just about any narrowband A/F gauge will work with the early 1 wire or late 4 wire O2 sensor.
It is really interesting to see how the ratio changes in open loop vs. closed loop modes. This inexpensive gauge will let you know a lot about the state of your AFM’s adjustment.
Radiator Cooling Fans
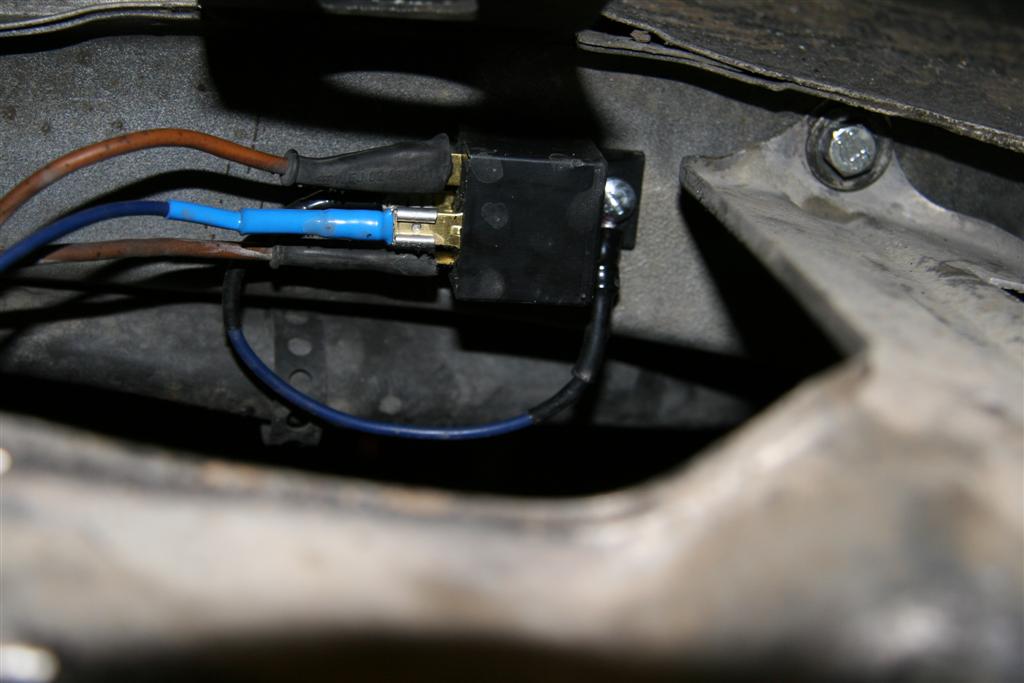
So this isn't a gauge, but I thought I'd include it here. I have upgraded my early electric fans with the 6 blade Turbo fans. These served me well in 2008, but they wouldn't come on when I was testing the new motor. I traced the problem to the fan switch in the radiator. Instead of replacing it, I decided to add a manual switch.
You can activate the fans easily by connecting the Brown/White wire going to the fan switch to a ground. You could simply connect this to a switch and the other side of a switch to a ground.
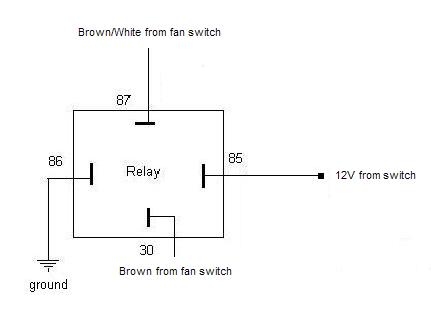
I wanted to use a lighted switch. These are available from AutoZone for about $8. The problem is that they always output 12V+ when activated and no connection when off. So to use the lighted switch, I needed a standard $4 automotive relay. Here's the relay wiring:
- 30 - Brown wire from fan switch (Fan Ground)
- 85 - 12V+ from lighted switch
- 86 - Ground
- 87 - Brown/White wire from fan switch (Fan Control)
Using a ground switch or the relay and lighted switch will cause the fan to turn on low speed when the ignition is off and high speed when the ignition is on. This is nice, because when the car is running, the fan is always running in high speed mode. When I kill the ignition switch when back in the paddock, the fan will continue to cool the motor down in low speed mode. To completely shut the fan off, I can flip the switch off or kill the master power.
The fact that the fan continues to run in low speed mode with the ignition off, is part of the reason I wanted a lighted switch. I didn't want to forget to turn it off.
-bj meyer
Clown Shoe Motorsports